
By MyNameStitch
Stem Canker (Stem Rot)
Stem cankers are what the name is, they form on stems from a fungus similar to white and yellow leaf spot. Weather can affect the way stem cankers can live; wet humid weather is what makes this fungus thrive. Canker fungus is caused and entered the same white and leaf spot fungus enters the plants, it enters through an open cut, wound, pruned wound, or pest infestation that has caused damage by eating leaves or chewing on the stem’s or stalks and can be transferred through rain. It can also get in through susceptible plants that have been wounded through environmental factors like animal attacks, pruning, LST (Low Stress Training), and using cutting utensils that are not sanitary that may have fungus or bacteria on them. Damage to the plant occurs in the form of a yellowish-brown discoloration on the lower portion of the stalk. Later, the leaves turn yellow and fall off, and the plant dries out and dies.They form mostly on the stems, but severe cases spotting starts to form on the leaves from internal tissue being cut of nutrients and water. In between nodes is where stem cankers start to form, and move up the plant, around the 3rd, 4th and 5th node is where it will mainly affects the plants. Stems will have brown lesions; eventually have a dark reddish-brown sunken canker in the stem. Sometimes if severe the wound may reopen and appear split in the middle of the area of the wound on the stem and can also create a buldge. The lesions can extend up the plant over 3 or 4 nodes, once this happens the plant starts to wilt from vascular uptake being cut. This gets confused with root rot when the plant starts to wilt, and leaves turn yellowish brown and or spots, because the stem canker does not show itself yet once this starts to happen. Once the stem canker has been observed and if not treated, the leaves will start to wilt with yellow, white and brown spots, similar to white and yellow leaf spot. When plants are affected by this, the plant is more susceptible to more fungus and viral infections, from air borne spores.
Prevent and Control
Preventing stem cankers is about the same way other fungus problems, making sure you treat wounds to your plant with H202, making sure your plants are free of pest’s and if you use tools to LST (low stress training) your plants pruning, and training, make sure all tools are sterilized before and after using them. Spraying your plant with fungicides in the months or times this fungus spreads. It’s very important that you catch this fungus before it gets to bad, once the damage has been done to the plant; the only way to get rid of this is to chop the plant down and treat the area that has been infected. Planting other plants near and or around this area can and will re-affect other plants when a new season starts.
Once your plant does have this, using fungicides until it is gone is crucial; if the canker has worsened foliar feeding is a must to help keep the plants vigor, strength and stamina in fighting the fungus. Stem cankers take over by slowly reducing the plants uptake and thus takes over the susceptibility of the plant and the fungus then takes over and worsens more quickly. Using anyone of these products will help control or eliminate stem cankers. (If the plant is to bad, nothing can save it and the plant must be cut down and tools sanitized to stop the spread of the fungus.) (Note: When using chemical and or organic control methods, do not spray the buds, and for health and safety reasons, stay away from spraying around the buds if all possible.)
Physan 20
TR-11000 Pyrethrum
Garden Disease Control
Multi Purpose Fungicide
Top Spin
Safer's Garden Fungicide
Concern Copper Soap Fungicide
Guardian Angel
Serenade Garden Disease Control OMRI
Safer 3-in1 Garden Spray OMRI
Sulfur Vaporizer
Organocide
SM-90
Any fungicide containing lime sulphur
Concern Copper Soap Fungicide
Fusarium Wilt
The United States released this fungus in an area; it later had devastating effects on cannabis plants even after winter had passed it stayed in the soil. Seedlings that were planted were killed several years after the fungus was released. This fungus can be air borne and transmitted like other fungus and pathogens, it gets in through susceptible plants that have been wounded through environmental factors like animal attacks, pruning, LST (Low Stress Training), pest infestation and using cutting utensils that are not sanitary that may have fungus or bacteria on them. Fusarium wilt causes internal damage to vascular lines inside the plant and blocks the plants ability to carry water and nutrients. Symptoms included wilting of the plant, leaves becoming necrotic and yellowing wilting of the leaves while the yellowing leaves may look like a nutrient deficiency, this is clearly a mask, with Fusarium wilt, leaves will yellow and stay on the plant, where with a nitrogen deficiency the leaves will yellow and fall off. While not affecting the roots, it does affect inside the plant cell walls, inside the plants walls will reveal a red brown color inside the tissue. Stems will change color from normal green and purple hue, to a dark purple to blackish color. This pathogen can get confused with root rot, because the symptoms this pathogen shows are nearly the same as root rot, but roots are not affected. This clogging effect inside is what causes the external symptoms. While this fungus is traveling inside the plant, the toxins spread to uninfected areas and causing the clogging effect internally, these toxins is what causes the other un infected tissue to start to show the 2ndary problems, which are slow wilting of the leaves, stem collapse, stem discoloration and overall droopiness (as if the plant is dry and had no water) to parts of the plant, even if they get plenty of water. This fungus is a real killer to cannabis plants, any remaining plants that are survived can be stunted. Fusarium Wilt thrives in warm moist temperatures, which is why southern states have Fusarium Wilt the worst.
Prevent and Control
Fusarium Wilt is by far one of the hardest things for cannabis to overcome, if it ever does overcome it. Your plant health, environment and strain have a lot to do with weather or not Fusarium wilt will take over your plants. This pathogen mainly affects cannabis and hemp family, but can affect other plants but does not show the damaging effect it has on cannabis, like it does on other kinds of plants. This pathogen was breed specifically to attack wild cannabis plants and growers who grow there plants outdoors’. There is no form of organic control for this type, reason for this is, because the fungus is so strong and not susceptible to much of anything unless you get it right when it starts, if you do not get it in time, it thrives in the plants and consumes and kills the plants. There is only a few ways to control this fungus, one is to fumigate the area you are growing in killing the pathogen in the soil while it is dormant, so when you grow in this area again, your plants are much less likely to get it, the only other way your plants could get this if not from the soil, is from airborne spores get in through open wounds on your plants leaves, stems and stalks. Plants that produced seeds when it was infected with Fusarium wilt should not be used, as the pathogen stays dormant on the seed and attacks it when the seedling emerges and causing the “damping off” effect and thus killing the seedling before it even has a chance to grow it’s real first set of leaves. Acidic soil helps boost Fusarium wilt. Stay away from acidic soils .Counteract this by using dolomite lime, or green sand Using potassium and calcium enriched organic nutrients can help fight off and prevent Fusarium wilt, excessive amounts of nitrogen, phosphorus can speed up Fusarium wilt.
If your plant gets this it will surely die, the only thing you can do is try to reduce the destruction by foliar feeding areas that are not infected, cut off infected areas discard them away from your growing areas and treat the wound with h202 (Hydrogen Peroxide).
Making sure you clean your tools afterwards is important. Treating with fungicides will not work in controlling this.
Pictures below show Fusarium Wilt infection.
(Photo Credit: Hort)


Powdery Mildew
Mildew spores can be brought into the grow room through air ventilation into your grow room, your cloths, pets and be carried by animals outdoors. and land on the plant infecting other parts of the plant, buds, stems, stalks and leaves, also spores can land on indoor grow room walls, tubes, growing equipment, hoods, ballast’s, cords and etc. Spores can remain dormant until environment factors trigger it, like high humidity and cool temperatures, poor air circulation. Powdery mildew in vegetative growth is much easier to rid than in the later stages of flowering. Night time temperatures and moisture triggers spores to be released. The mildew eventually covers and coats the plant thus reducing the process of photosynthesis. If left untreated powdery mildew will infect all plants in your garden and coat your plants in flour like substance and cause leaves to “suffocate” Yellow and die off. If your plants are in flowering, depending how far into flowering, your buds will eventually become infected and will not be able to be used. Buds will have a stale moist smell and will be coated with a white powdery substance that can’t be removed no matter what you do. Very early detection in flowering plants that have powdery mildew is extremely important, the longer you wait in flowering the more impossible it gets to eradicate this, due to this, bud size gets bigger in flowering and having high humidity temperatures over 65% can trigger active spores to start, not only powdery mildew, but triggers other problems from it, like bud rot. Not only will you have lower yield, but you won’t have any buds, due to the fact mold has crippled your harvest.
Strains vary in susceptibility to molds, just like other pathogens and nutrient requirements and care.
Prevent and Control
Symptoms of your plants having powdery mildew include: white blotches of furry stuff and white spots or splotches that you can wipe off, having humidity that is over 65%, also starts on darker areas of the plant and spreads to the top. Darker areas on your plant that do not get a lot of light will start to show this first, then when spores become active it spreads to everything. The longer you let it go the harder it will be to eradicate, late flowering plants that have this are extremely hard to get rid of, due to bud density thicker in late flowering plants, because of this the mildew attacks the buds which you can’t cure mildew once it affects the buds.(also known as Bud Rot)Plants that are stressed from environment factors, or fighting pest’s will be taken over more by this mold, due to the fact it’s already fighting problems. If you see your stressed plants getting it first, try to isolate the plant and bring down humidity, better air ventilation and or negative air pressure grow room. If you have mildew with your fans running, you will need to take them down and clean them as the fans can spread spores around the room. You will need to wash down everything in your indoor grow room, spores land on everything, so everything needs to be washed with mild hot water and bleach solution. Removing infected leaves from the grow room is critical, carefully removing them and trying to not knock spores into the air is a challenge. Applying a bag over infected leaves and tying it shut then removing it helps out with not knocking up spores in the air. Making sure you use h202 on stems that have open wounds from leaves that was removed. DO NOT water when lights are going to be going out, doing this keeps water on the plants soil and causes higher humidity levels, this goes for foliar feeding. Water plants when lights first come on or there is at least 5 hours left of lights on. You want to reduce the amount of humidity as possible if your levels of RH are high, you want to keep your humidity levels around 40 to 50%, and anything over 60% is going to trigger problems. Also keeping plants spaced apart allowing maximum air flow in between plants will help minimize plant to plant infection. Using a dehumidifier can greatly reduce humidity issues. Using a meter that tells your grow room conditions like temperature, RH and time can help combat your problems, by keeping track before and after you water can tell you how much if any your humidity can rise after changes made to the grow room. Sulphur Burner is another way to prevent and kill powdery mildew by vaporizing spores in the air. (Do not apply sulfur when air temperature is near or over 90°F) Controlling your mildew outdoors can be somewhat of a challenge, you can’t control outdoor temperatures, or environmental factors, Using Vapor Gard,Wilt Pruf sprayed over the leaves can prevent infection’s.
You will need to treat your plants with various organic and chemical controls. This list will work for indoor and outdoor growers in killing and preventing Powdery Mildew. Outdoor growers can use Organics List below to help prevent Powdery Mildew of starting, even after it has started using anything below will help kill it off. (Note: When using chemical and or organic control methods, do not spray the buds, and for health and safety reasons, stay away from spraying around the buds if all possible.)
AQ10
Serenade
Plant Shield
Garden Disease Control
Fungicide containing Lime, Sulphur
JMS Stylet Oil
Saf-T-Side Spray Oil
Sunspray Ultra-Fine Spray Oil
Neem Oil
Neem 2
Kaligreen
Safer Garden Fungicide
Concern Copper Soap Fungicide
Guardian Angel
Serenade Garden Disease Control OMRI
Safer 3-in1 Garden Spray OMRI
Sulfur Vaporizer
Organocide
SM-90
Malatox
Garden Sulphur
Sulphur Burner
Sodium Bicarbonate
Chi
Mother Nature's Karanja Oil
Concern Copper Soap Fungicide
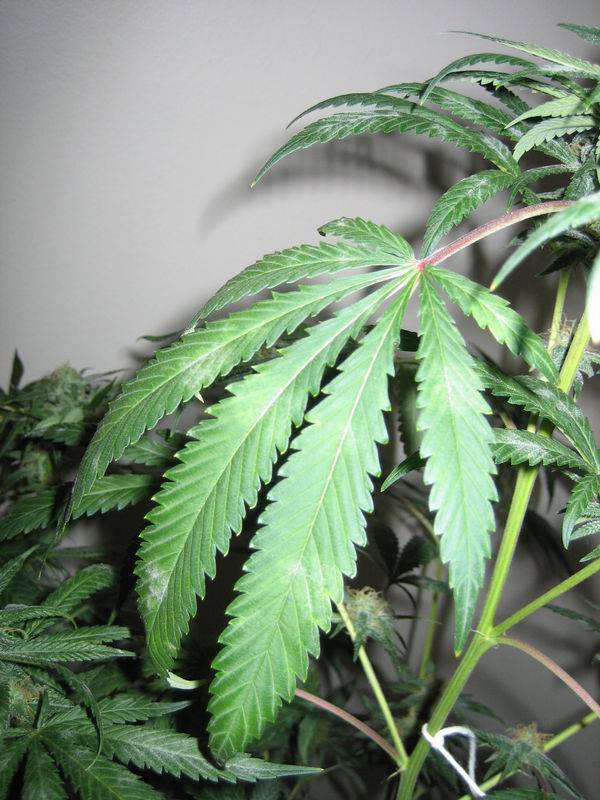
Picture below shows Powdery Mildew
(Photo Credit: Beach Stoned)
Damping-Off
Damping-Off is a fungus that is in soil mixtures, it attacks seeds and seedlings before and after it emerges from the shell. Seedlings that get attacked by this fungus usually die, considering the plant doesn’t have a fighting chance nor a system setup to help fight the fungus. A range of growth stages the plant can be attacked, up to 8 sets of true leaves, or 3 leaf nodes. Leaves, roots, and stems can be affected. Damping-off can be easily confused by excessive fertilization (Nutrient Burn), high levels of salts from either water or nutrient solution build up, excessive heat or cold, excessive or insufficient soil moisture. The Cotyledons show on the soil surface can whither and die or healthy looking seedlings may suddenly fall over. Infection first starts right below the soil line; once attacked, the seedling and vegetative stage plants will start to rot, lower part of the stem will be soft, brown and or leaves will turn purplish hue and can yellow, brown and then fall over or shrivel up; can be any one of these or show all symptoms. Seedlings, or vegetative stage plants then can start to fall over from stem being so soft and starting to rot inside out, one item contributes to this problem is over watering, putting seedlings, or small plants into a big pot; when you water the soil down lower soaks up excess water and ends up sitting in the middle to bottom part of the soil in the pot. When this happens fungus begins to build up due to them not having a deep enough or a big root system to absorb all the excess water, then it ends up turning into damping-off. Later stages of damping-off in vegetative stage seedling, the leaves will droop and turn yellow, as if the plant was over watered. Stems will be severely weaken and may fall over from being under developed and skinny. Older plants can build up a resistance to damping-off, but if they do not, older plants show long skinny stems, stunted roots, and stem discoloration. The Soil that is rich in nitrogen, r rich mixture, and soggy soils, soil that stay wet for long periods, and warm soil or temperatures. Even hydroponics systems can get damping-off; mediums that stay too saturated, you have less likely chance of getting damping-off in hydroponics systems.
Prevent and Control
In order to help control damping off or preventing it you should try to start seedlings in “starter cups”, drinking cups you get from the store; putting drainage holes in the bottom of the cups is extremely important in helping avoid damping-off, allowing excessive water drain so the bottom half of the mixture will not stay wet.
This is why cups are great for starter seedlings, you can still over water, but your chances of getting damping off are much less than that of a seedling put into a big pot with lots of soil. Making sure you have holes and a good amount of perlite in your mixture helps greatly, I always recommend cups having drainage holes. Putting seeds into the soil at a low depth helps out, just putting it an inch or 2 at the most helps avoid the fungus.
Avoid starting planting in rich soil mixtures, not only can you burn them when they emerge out of the soil, but too much nitrogen can lack root growth and aggravate damping-off. Try using a seed starter mixture, not watering heavily, and avoid watering everyday, seedlings in cups should only be watered a bit every 2 days, seedlings with 2 to 3 sets of leaves in cups can start to be watered more heavily where water starts to drip out the drainage holes, only then you should water like this every 3 days. Over watering is one of the biggest causes of
damping-off. Also using soiless-mixtures like peat growing mixed with other stuff can help deterrent it. If you decide to get mostly soil with peat moss, you must make sure there is dolomite lime added to adjust the p H, otherwise you will have ph issues that can lead to locking out nutrients that are in the soil, but not able to be absorbed because the ph is off. Using sterile soil helps greatly, Allow great air flow and circulation in your grow room, allow the surface to dry before watering again, using moisture meters, or sticking your finger down in the soil near the edge of the pot to test for wetness down in the soil. Testing the soil near the edge of the pot helps to avoid bothering root development.
Once Seedlings that have already emerged from there seed shell and end up getting affected by damping off has a very high chance they will not survive and there is nothing you can do about it, by the time it shows in seedlings, it will already be to far gone. Using a fungicide on the seed before putting it into soil mixtures helps to avoid post emerge damping-off. Vegetative stage plants with a few sets of leaves has a better chance of fighting it off, using a fungicide can help depending on how far along the fungus has spread. Using any of these products below can help avoid or kill damping-off. (If using on seedlings or seeds, use organic based fungicides.) Chemical control should only be used on older plants, not seedlings.
Physan 20
Garden Disease Control
Multi Purpose Fungicide
Top Spin
Captan
Thiram
Apron
Safer's Garden Fungicide
Concern Copper Soap Fungicide
Guardian Angel
Serenade Garden Disease Control OMRI
Safer 3-in1 Garden Spray OMRI
Organocide
SM-90
Root Rot
What causes root rot? Low oxygen levels. (DO) Dissolved oxygen. Temp's are the main reason for root rot, Low temps will lower the DO levels and high temps will cause low DO levels. Keeping temps between 65 to 72 will allow MAX DO levels or max o2 for roots. Over watering also causes root rot, root rot infects parts of the roots, which then spread infecting the whole roots causing death, root rot can be caused by to high of temps in hydro as well as over watering. Not enough drainage in your soil can cause root rot, even signs of it looking over watered, because the soil holds moisture to long for the roots to dry out. So these 3 things are all connected together. The main one that causes everything is over watering. Once you find out you have root rot, depending on how bad the problem is, you can add H202( Hydrogen Peroxide) with your water or hydro setup to kill the bacteria caused from root rot.
To prevent Root Rot, adding product's like Thrive Alive B-1, See Weed, Super thrive will help protect your plant's from root rot and will help cure root problems. ( Again ty so much for giving me the info syko2!!!)
Here is what root rot looks like: 4eBig thanks goes out to buzz, diggerdigzit and Shop Vac! Thanks for the pics guys! :tup:
First pic is of to high temps in the bubbler: Last 2 pics came from chemical burn root rot first pic, moldy rock wool with root rot.
(Picture Provided by Buzz)

(Pictures 2 and 3 Provided by Chemical Burn)


(Picture 4 was contributed by Diggerdigzit)

Bud Rot
During the last week or two of flowering, depending on if you use chemical or organics. If you use chemical, you want to flush 1 ½ weeks to 2 weeks before harvest to flush out all of the chemical nutrients that your plant was using. If you are using Organics then you would want to flush about a week before harvest. Giving them plain water is fine, flushing them also improves the overall quality of your bud. Once you start to 'flush' you should check extra careful for bud rot. Bud Rot Happens when the humidity is high, if you have fat dense buds, or if mold spores are in the air. Bud rot looks like a black brownish sludge that can quickly take over your plant and ruin your harvest. The mold spores are air-borne.
Prevent and Control
Removing any dead or dying material from the plant helps prevent bud rot so does decreasing humidity and increasing ventilation. There are also safe anti fungal sprays from hydro shops that help. If you do find gray mould, cut off the infected part of the plant well above and below the effected area and remove it from the grow room. Decreasing the humidity from 55% to around 40% will make a big difference in preventing bud mold. Also having very big buds can cause bud rot, and would advise watching the areas on your plant that have the biggest, thickest and the more dense buds. Try to have medium size buds rather than having big thick buds. Having a dehumidify around when high humidity days can help as well.
To protect them against bud rot for outside. DO NOT foliar spary at night, doing this the heat will not evaporate the water as well because it is night.
Water the plants in the day instead of so close to being night. Same as foliar spraying.
Make sure your plants are stress free as possible and checking plants often can aid in getting rid of moldy bud before the spores spread onto other areas of the plant! Have a lot of air going around the plants for bad ventilation= sick plants and a breeding ground for spores!
Keep leaves away from soil making sure they do NOT touch the soil.
Keep cooler temps at night while plants are on there down time.
If you have gotten bud rot already the best thing to do is cut off the bad buds discard them away from you’re grow and apply any of the following: Neem oil, Neem2 which is a ready made solution!
Using high ph water for foliar spray prevents them from spreading as well kills the mold. pythium is another good product to use! There are many other chemicals and organics that work, but these are the most popular and they work very very well!
Fungus
Fungus is another problem when you are in flowering, because they are susceptible to a fungus or bud rot. Growing conditions for fungus are best when temps are between 60 and 80 degrees and the humidity is high. The fungus is very destructive and spreads quickly. These kinds of fungus are air borne and can travel to other bud sites. If you already have been infected by them the best thing you can do is cut off and remove the infected area and then discard out of the grow area, then get a hold of some anti-fungal spray and apply.
Fungi can kill your crop quick, so invest in some SAFE fungicide and spray down the plants as much as you can and as soon as you can. The faster the safer.. If you have had problems with fungus before, do NOT spray them you will contribute to the fungus becoming resistant to the spray/chemicals you are using. Try to keep the humidity down to the range fungus do not grow to well in. Keep a good amount of ventilation around your grow, and if you have plants outside, always keep them quarantined away you’re your indoor plants until you know they are safe.
Most fungicides are very nasty and eating them can be very dangerous so its best to use something on them that is safe on plants that you can eat., Safer makes a very safe product that can be found in most stores and hydro shops. it contains only sulfur in solution. Here is a picture of what bud rot looks like when it starts to form.
Control
To control to prevent fungus from forming there are a few things you should do.
DO NOT foliar feed at night, tends to make humidity higher rather than when you water in the day the water has time to evaporate where at night will linger in the air.
Same goes for watering plants at night, wait till the morning or afternoon to water!
Keep a happy plant and will not become prone to infections. Checking plants often can aid in getting rid of any fungus that may attack other leaves and or bud!
Have a lot of air going around the plants for bad ventilation= sick plants and a breeding ground for spores!
Keep leaves away from soil making sure they do NOT touch the soil.
Keep cooler temps at night while plants are on there down time.
If you have already gotten some kind of fungus there are things you can use: neem2, neem oil works wonders!! Potassium Bicarbonate, Baking soda and for other chemical agents you can use Plant Shield, Serenade and pythium! There are many other chemicals and organics that work but these are the most popular and they work very very well!
BIG THANKS goes out to Bud63 for letting me use the pics!! :tup:


http://www.icmag.com/ic/showthread.php?t=11688
